|
|
16. NodeMCU ESP8266 WIFI Communication c# wpf software
A simple project were you can control a led with a windows app with WIFI, connected to a NodeMCU ESP8266. The app is written in Visualstudio 2017 in C#.
On the rigth: arduino monitor for output NodeMCU ESP8266 sketch.
On the left: windows app for controlling the LED.
Bottom: Breadboard with LED and the NodeMCU ESP8266.
- Flashing LED
- Upload sketch
- LED on click
- LED off click
- Flash LED
| NodeMCU ESP8266 |
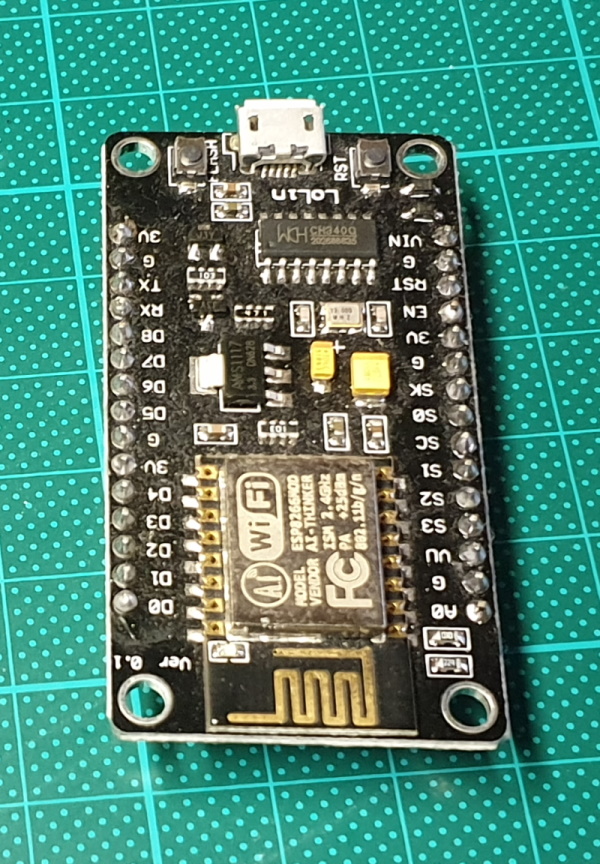 |
NodeMCU Dev Board is based on widely explored esp8266 System on Chip from Expressif.
Feature:
- Wireless 802.11 b / g / n standard
- Support STA / AP / STA + AP three operating modes
- Built-in TCP / IP protocol stack to support multiple TCP Client connections (5 MAX)
- D0 ~ D8, SD1 ~ SD3: used as GPIO, PWM, IIC, etc., port driver capability 15mA
- AD0: 1 channel ADC
- Power input: 4.5V ~ 9V (10VMAX), USB-powered
- Current: continuous transmission: ≈70mA (200mA MAX), Standby: <200uA
- Transfer rate: 110-460800bps
- Support UART / GPIO data communication interface
- Remote firmware upgrade (OTA)
- Support Smart Link Smart Networking
- Working temperature: -40 ℃ ~ + 125 ℃
- Drive Type: Dual high-power H-bridge driver
- CH340 chip-driven
* The ESP8266 chip requires 3.3V power supply voltage. It should not be powered with 5 volts like other arduino boards.
* NodeMCU ESP-12E dev board can be connected to 5Vusing micro USB connector or Vin pin available on board.
* The I/O pins of ESP8266 communicate or input/output max 3.3V only. i.e. the pins are NOT 5V tolerant inputs.
|
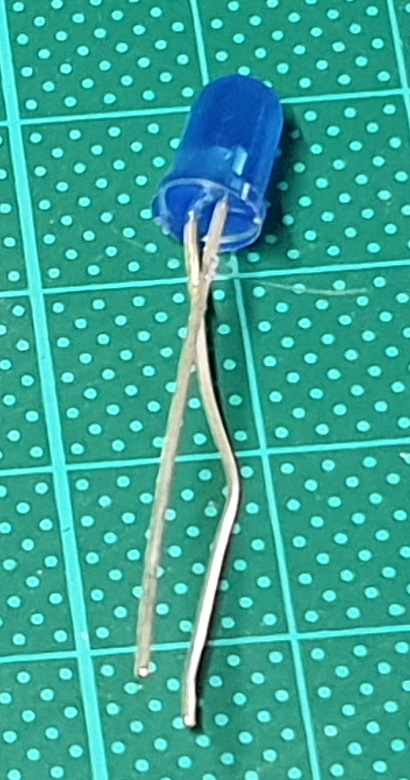 |
Blue LED |
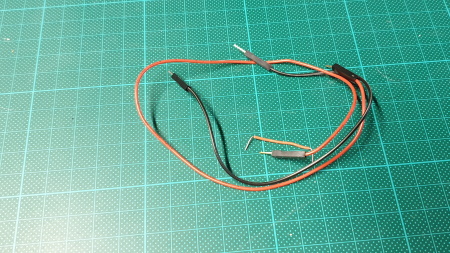 |
Wire |
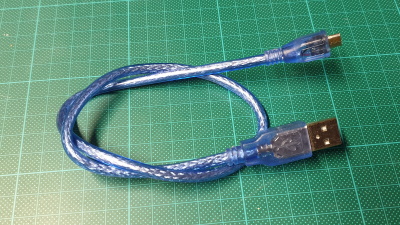 |
Micro USB Cable |
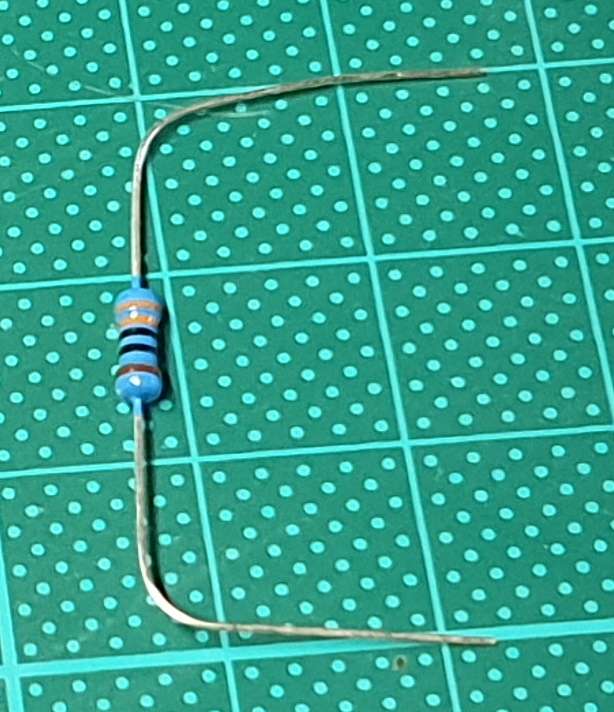 |
Resistor |
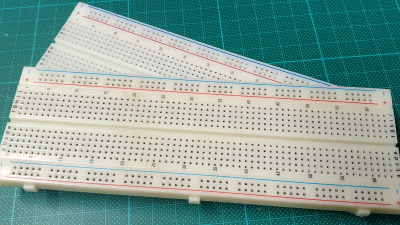 |
Breadboards |
| Software |
Arduino IDE |
|
Visual studio |
Arduino IDE
Installing Arduino Core for NodeMCU ESP-12E Using Arduino Boards Manager.
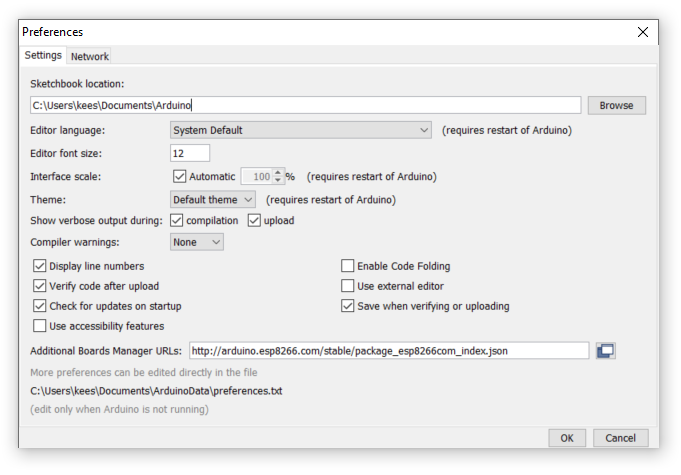
- File, Preferences
-
Copy 'http://arduino.esp8266.com/stable/package_esp8266com_index.json' into Additinal Boards Manager URL's
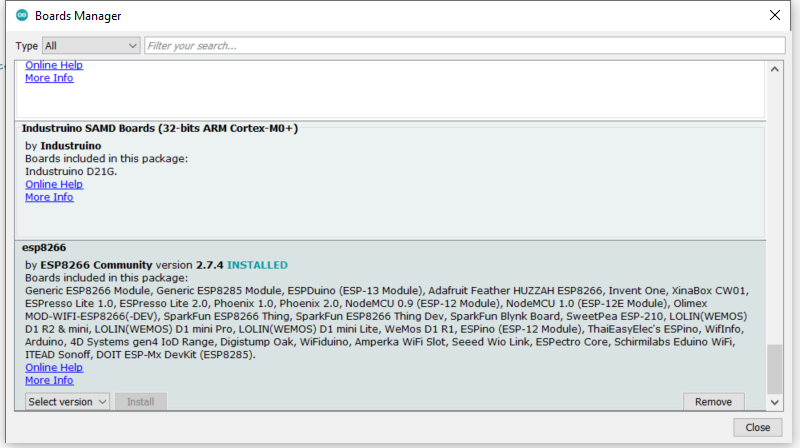
- Board '...', Boards Manager
- There should be an option 'esp8266', 'by ESP8266 Community'
- Select install
- After installing, it should look like this.
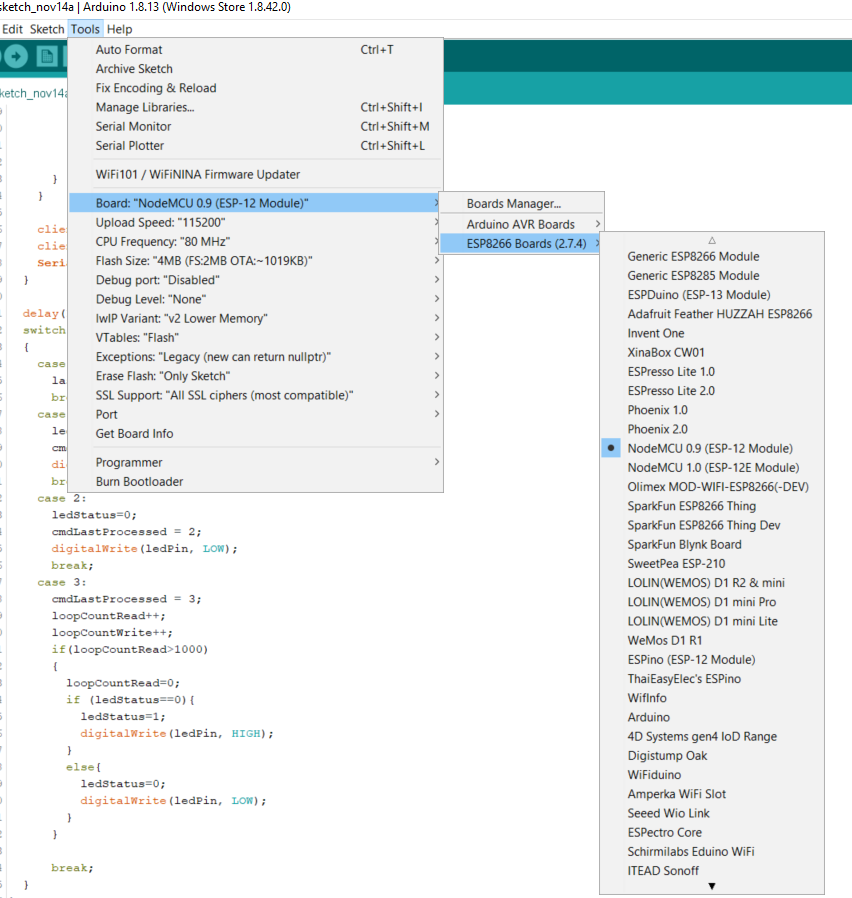
Select NodeMCU board.
- Tools, Board: '....', ESP8266 Boards, Nodemcu 0.9 (ESP-12 module
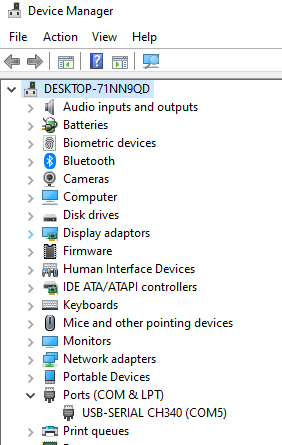
Select Port number.
- Tools, Port, COM...
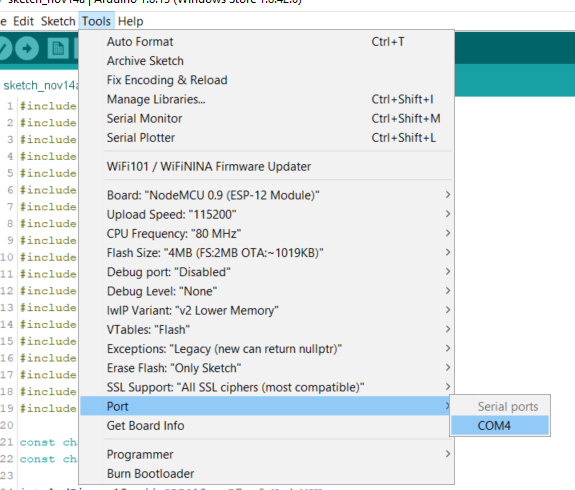 - If greyed out, in 'Device manager', Ports(COM LPT, USB-SERIAL CH340 (COM...) must be visible
Setup the components.
- Short leg LED to Ground
- Long leg resistor, d7
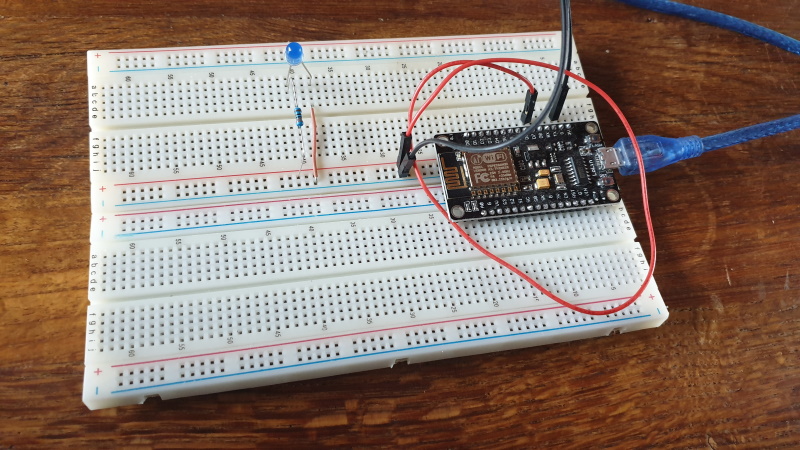
Connect NodeMCU ESP8266 to the computer.
Sketch
#include <BearSSLHelpers.h>
#include <CertStoreBearSSL.h>
#include <ESP8266WiFi.h>
#include <ESP8266WiFiAP.h>
#include <ESP8266WiFiGeneric.h>
#include <ESP8266WiFiGratuitous.h>
#include <ESP8266WiFiMulti.h>
#include <ESP8266WiFiScan.h>
#include <ESP8266WiFiSTA.h>
#include <ESP8266WiFiType.h>
#include <WiFiClient.h>
#include <WiFiClientSecure.h>
#include <WiFiClientSecureAxTLS.h>
#include <WiFiClientSecureBearSSL.h>
#include <WiFiServer.h>
#include <WiFiServerSecure.h>
#include <WiFiServerSecureAxTLS.h>
#include <WiFiServerSecureBearSSL.h>
#include <WiFiUdp.h>

const char* ssid = "WIFI ID";
const char* password = "PASSWORD";

int ledPin = 13; // GPIO13---D7 of NodeMCU
int loopCountRead = 0;
int loopCountWrite = 0;
int ledStatus = 0;
int lastCmd = 3;
int cmdLastProcessed = 3;
WiFiServer server(80);

void setup() {
  Serial.begin(115200);
  delay(10);

  pinMode(ledPin, OUTPUT);
  digitalWrite(ledPin, LOW);

  // Connect to WiFi network
  Serial.println();
  Serial.println();
  Serial.print("Connecting to ");
  Serial.println(ssid);

  WiFi.begin(ssid, password);
  WiFi.mode(WIFI_STA);

  while (WiFi.status() != WL_CONNECTED) {
    delay(500);
    Serial.print(".");
  }
  Serial.println("");
  Serial.println("WiFi connected");

  // Start the server
  server.begin();
  Serial.println("Server started");
  Serial.print("IP: ");
  Serial.println(WiFi.localIP());
}

void loop() {
  WiFiClient client = server.available();
  if(client)
  {
    //client.setTimeout(200);
    while(client.connected())
    {
      if(client.available()) {
        char c =client.read();
        if (c=='.'){
          break;
        }
        else
        {
          if (c>='0' && c<='3')
          {
            lastCmd = c- '0';
            Serial.print("Last command: ");
            Serial.println(lastCmd);
          }
        }
      }
    }

    client.write('0' + lastCmd);
    client.stop();
    Serial.println("client disconnected");
  }

  delay(1);
  switch(lastCmd)
  {
    case 0:
      lastCmd = cmdLastProcessed;
      break;
    case 1:
      ledStatus=1;
      cmdLastProcessed = 1;
      digitalWrite(ledPin, HIGH);
      break;
    case 2:
      ledStatus=0;
      cmdLastProcessed = 2;
      digitalWrite(ledPin, LOW);
      break;
    case 3:
      cmdLastProcessed = 3;
      loopCountRead++;
      loopCountWrite++;
      if(loopCountRead>1000)
      {
        loopCountRead=0;
        if (ledStatus==0){
          ledStatus=1;
          digitalWrite(ledPin, HIGH);
        }
        else{
          ledStatus=0;
          digitalWrite(ledPin, LOW);
        }
      }

      break;
  }
}
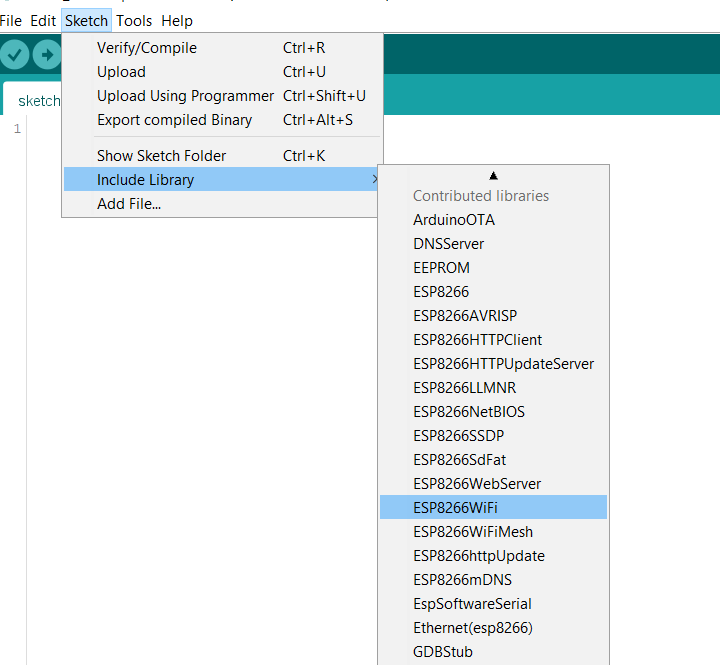
- Include libaries:
Sketch, Include Library, ESP8266Wifi
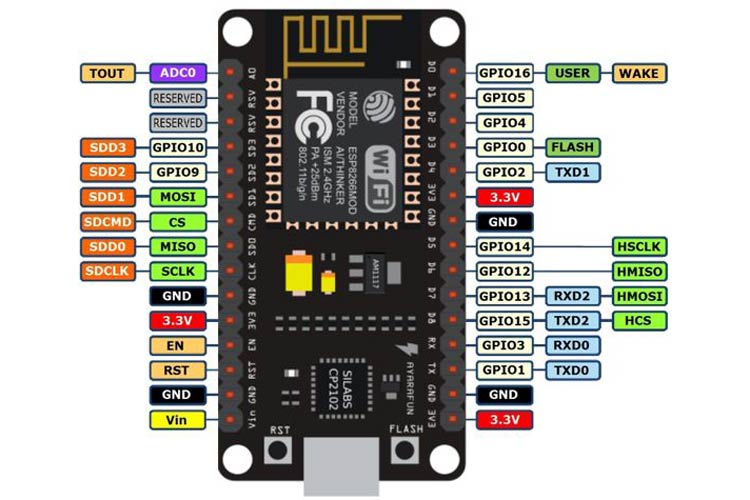
-
int ledPin = 13; // GPIO13---D7 of NodeMCU
Pintlayout:
- WiFiServer server(80)
Creates a server that listens for incoming connections on the specified port.
-
WiFi.begin(ssid, password);
The actual connection to Wi-Fi.
The connection process can take couple of seconds and we are checking for whether this has completed in the loop.
-
server.begin()
Tells the server to begin listening for incoming connections.
-
WiFi.localIP()
Gives the IPv4 address of de ESP8266.
Used in de VisualStudio, to send the commandsto the ESP8266.
-
WiFiClient client = server.available();
Gets a client that is connected to the server and has data available for reading. The connection persists when the returned client object goes out of scope; you can close it by calling client.stop().
-
if(client)
true: client is created.
false: client is not created. client is 'null'
-
client.connected()
Whether or not the client is connected. Note that a client is considered connected if the connection has been closed but there is still unread data.
-
client.available()
Returns the number of bytes available for reading (that is, the amount of data that has been written to the client by the server it is connected to).
-
client.read()
Read the next byte received from the server the client is connected to (after the last call to read()).
-
client.stop();
Disconnect from the server.
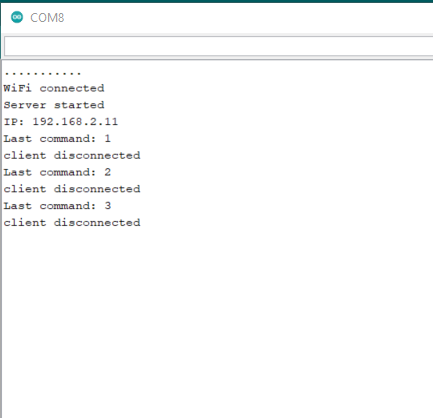
Monitor output
 Download ino
Visual studio
Communication loop.
The class 'TcpClient' is used for sending the messages to de NodeMCU ESP8266.
        private void DoLoop()
        {
            SendMsg oldMsg = SendMsg.reset;

            while (1 == 1)
            {
                if (oldMsg==_SendMsg)
                {
                    System.Threading.Thread.Sleep(10+00);
                    continue;
                }

                oldMsg = _SendMsg;
                TcpClient client = new TcpClient();
                try
                {
                    client.Connect("192.168.2.11", 80);
                }
                catch
                {
                    continue;
                }

                using (NetworkStream ns = client.GetStream())
                {
                    ns.ReadTimeout = 2000;
                    byte[] mybyte = Encoding.UTF8.GetBytes(((int)_SendMsg).ToString() + ".");
                    Send(ns, mybyte);

                    System.Threading.Thread.Sleep(500);

                    try
                    {
                        byte[] recv = new Byte[1];
                        if (ns.DataAvailable)
                        {
                            int bytes = ns.Read(recv, 0, recv.Length);
                            if (bytes > 0)
                            {
                                byte[] a = new byte[bytes];

                                for (int i = 0; i < bytes; i++)
                                {
                                    a[i] = recv[i];
                                }

                                string converted = Encoding.UTF8.GetString(a, 0, a.Length);

                                switch(converted)
                                {
                                    case "0":
                                        ledStatus = "Status";
                                        break;
                                    case "1":
                                        ledStatus = "On";
                                        break;
                                    case "2":
                                        ledStatus = "Off";
                                        break;
                                    case "3":
                                        ledStatus = "Flash";
                                        break;
                                }
                            }
                        }
                    }
                    catch (Exception ex)
                    {
                    }
                }

                client.Close();
                System.Threading.Thread.Sleep(500);
            }
        }
Download solution (Visual Studio 2017 solution)
|